Plastic Injection Moulding: Bringing Your Designs to Life
29 July 2016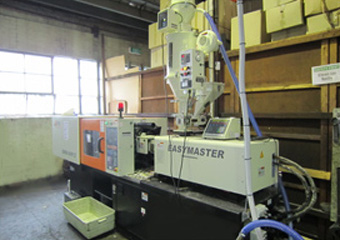
Whenever a client needs an accurately rendered metal-free part, plastic injection moulding is there to do the job. The process is best described as a fast and cost-effective means of repeatedly manufacturing thousands of geometrically intricate plastic components, each one identical to the next, but enough has been said about such utilitarian attributes. Instead, let’s change course and have a look at how the production method brings designs to life.
The Building Blocks of Injection Moulding
We’re tempted to jump straight into the crux of the matter, the drafting of complex plastic parts, but that would mean skipping the meat-and-bones of the process, so we’ll begin at the beginning. It starts with plastic granules. This raw material drops from a hopper as it’s melted by a heating unit. Next, the amorphous plastic mass fills a long barrel and is pushed forward by a screw-like mechanism. Driven forward by the ram, the liquid thermoplastic terminates at a mould cavity, fills the cavity, and hardens. The pressure-driven plastic now fully conforms to the mould void. It cools and is ejected, fully formed so that the next cycle can begin.
Employing Computer Space as a Blank Canvas
Computer Aided Design suites act as the equivalent of a blank sheet of paper in this scenario. Plastic moulding machines don’t actually directly interact with this software, not in the same way a 5-axis milling machine does when cutting a metal part, so where does the shaping alchemy happen? That would be where the mould cavity attached to the barrel enters our setup. This mould receives the thermoplastic liquid, as we explained earlier. Still, we’re missing a stage. Something has to happen between the computer rendering station and the creation of the negative void pattern.
Making the Mould Pattern
The CAD designs are created in virtual space and tested by simulation modules to see if they can function as prototypes. It’s a stage that encourages experimentation and creative flow because no materials are being wasted. Now, with the virtual design complete, it’s passed over to that 5-axis CNC milling machine we mentioned in our last paragraph. This is the bridging stage, for the CAD file translates the design into dimensional vectors, and, like magic, the mould is created in its alloy-reinforced form.
Before plastic injection moulding ever drops a single particle of plastic into its preheated hopper, designers breathe life into the product or part by creating prototypes inside computers. Milling workshops bridge these stages, but 3D printers have also been employed here, machines that are well on their way towards duplicating the functions of a machine shop.
Optimized by NetwizardSEO.com.au